
It’s tempting to resort to teaching a new concept by showing how it’s written in the music.
But using tangible objects like tiny animals does a much better job of engaging the imaginations of our students. It makes it easier for them to focus their attention. Instead of adding the difficulty of using their fingers to play while they’re learning new concepts, it gives them a sensation-rich way to experiment with new ideas. It provides a kinesthetic, physical, joyful kind of learning.
If you were seven years old, which question would you want to be asked:
Which chord degree requires modification?”
or
Should you move the Unicorn or the Owl?”
Even I prefer the second one and I’m not a kid! It just sounds like more fun.
My colleague Michelle wrote to me about teaching piano with Japanese erasers last year when lessons were mostly online:
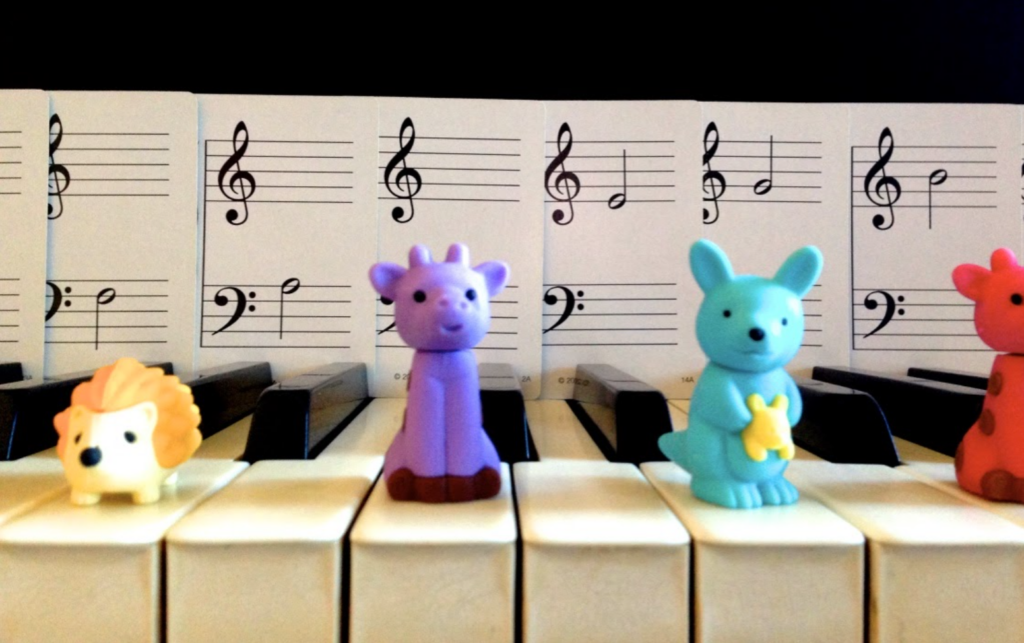
Japanese puzzle erasers were a life-saver when all my lessons suddenly went online. Kids who craved visual demonstration complained that they “couldn’t see” what I was playing, especially when it came to triads and chords. Even with a state-of-the-art overhead camera and gigabit wired internet, it wasn’t until I placed the erasers on individual keys to highlight the shapes of different inversions that it clicked. I subsequently dropped off little packages of three erasers for each of these students to use at home.
Michelle – piano teacher
Years ago I was teaching a little boy about Major and Minor Five Finger Positions using erasers. Her father was sitting nearby. He started to chuckle quietly. When I asked him why he was laughing, he said,
I just love the idea of Penguin Minor! I wish my teacher had made it that much fun!
Even better, it turns out, these little erasers aren’t just for teaching children! I’ve used these charming animals with five-year-olds, Stanford Law Professors, and everything in between. Teaching piano with Japanese erasers provide a brilliant way to engage different parts of the brain at the same time.
Here are just a few of the many ways you can use these animals:
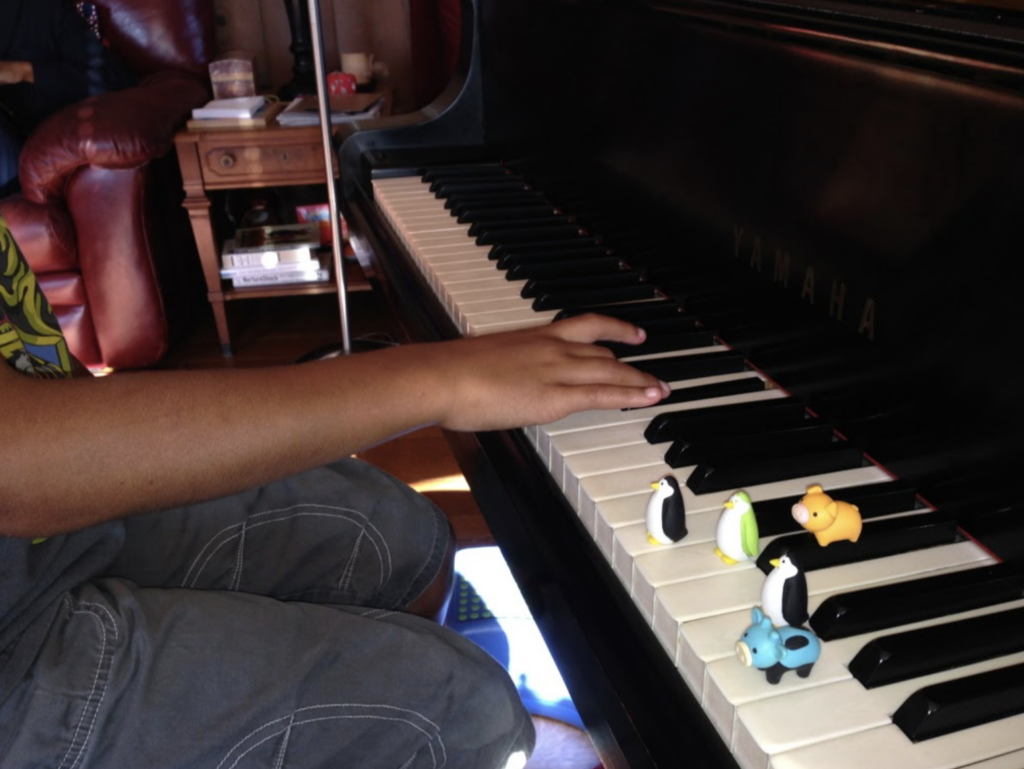
Imagine a particularly squirmy 5-year-old just learning to find and name the notes on the keys. If you put some animals on the side of the room away from the piano and then ask,
James, can you put an animal on each and every D on the piano? But, you can only pick them up one at a time.
Now you’ve created a theory game that’s also an off-the-bench activity! It gives your student a chance to move and show you where all the D’s are. Best of all, they’ll be motivated to do it and will have a visual representation of all the D’s when they’re finished!
Combining erasers with flashcards is a winning strategy. Instead of just having the student play a particular note, have them place an animal of their choice on the correct key.
Sometimes I’ll ask a student if they’d like to pick a few animals to put on the piano to keep them company for their lesson. Those animals can later jump in and help them remember things like the notes which are sharped in a key signature.
Susan, it is so hard to remember which notes are sharped. Would your animal friends like to hop down onto the notes that are sharped in this piece to help you remember?
These simple plans can make the difference between a successful lesson and a frustrating one.
Finding Japanese Erasers
There are scores of packets of Japanese Erasers on Amazon. Here is one and another and yet another for example.
How are you teaching piano with Japanese erasers? What are other props you like too? Please share your thoughts in the comments!
Hi Wendy,
I love teaching with little animal figures. I have 4 sets of life- like animals including: ocean; farm; rainforest and African. I have the student pick an animal that starts with the letter on the key- this way they’re associating D on the keys with the ‘dog’ between the 2 black keys (imagine it in a doghouse?)! I hold up my fingers 2 and 3 in an upside down V showing the doghouse roof for emphasis, as these are often the fingers they start with. I also have a gorilla and an ape to put between the 3 black keys (imagine the letter M) for the ‘monkey’ house. Same idea there – show the roof with the 3 fingers touching the 3 black keys making an M. The frog makes a great F option and works well for teaching staccato (hopping). As they’re learning the notes it’s fun to keep pulling the animals out – and giving them a ride on the keys as they play!
Awesome. I love the ideas, Marilyn! Thanks for sharing those for everyone to benefit!
When introducing Ds on the piano, I expand a little on Diane’s placing the animals on the Ds one at a time…. I often play a black note rote tune I’ve created for Laura Hughes’ gorgeous book “We’re Going on an Egg Hunt”, where the student gets up and hunts for the number of eggs the rabbits collect on each page. The eggs are the type that break in half, with plenty of room inside to place a little creature. Once we’ve finished the book, the child opens the eggs to find little Dinosaurs, which they are asked to place on each D. We then play a fun game of Dinosaurs and Dragons, where they must bounce their own little dinosaur from D to D while my ‘dragon’ chases them playing each white note. They must press every D, and it must sound clearly, without hitting another note. We then play a few times up and down the piano with each hand, eventually taking the dinosaurs away.
At other times, depending on the note we’re focussing on, I might place tiny carrots in the eggs, or chicks, bunnies… and I try to tie them to the little piece we’re going to work on.
Of course, these games can be played separately, at any time during a lesson. This is just a tried and tested sequence I’ve found works really well initially.
I often introduce In the Hall of the Mountain King using erasers for each pattern in D minor and A major for section 2- often by then, it’s the walking backwards in minor thirds that the children find challenging rather than the upwards pentscales. But, I’ve still found it useful to show them the pentascale in both positions initially with erasers, then group the minor thirds with the same type of eraser (e.g. rainbow-rainbow, penguin-penguin, dog-dog). We’ll then mark up the score (I usually copy it to A3 as I work at a school) using colours to show steps, skips and jumps. It’s one of those pieces where I can really see the connection being made between a satisfying piece to play (that they love, because it’s in Trolls!), and written music.
Thanks for some great ideas! 🙂
I love to use them for practicing specific parts of piano pieces: We chose 3 figures – the goal is to move them from one place to another (this can also made up into a little story) . The rule :
For each correct/succesful round one animal is allowed to “travel” . For each failure one animal has to go back to starting point until all 3 arrived at the new destination. It really helps to focus, and gives the little students a tiny break between rounds. I found them to stick really strict to the rule, they have a lot of fun and a failure doesn’t feel frustrating at all to them anymore, it turns into a fun challenge where they can feel like a little hero at the end! 🙂